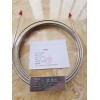
GDX-201不锈钢填充柱
如果你感兴趣的话,可以电话:0632-5667636 
产品名称:GDX-201不锈钢填充柱
产品型号:
产品厂商:浩瀚色谱(山东)应用技术开发有限公司
简单介绍
GDX-201不锈钢填充柱,液化石油气,二甲醚,甲醛,乙酸乙酯,环氧乙烷,硫化物,二硫化碳,二氧化硫,羰基硫,室内空气,非甲烷总烃,植物油,在线气相色谱仪,液相色谱
GDX-201不锈钢填充柱的详细介绍
GDX-201不锈钢填充柱
GDX-201不锈钢填充柱 详细信息:
以聚合物为基础的固定相—GDX业已广泛应用于许多领域中的性化合物的分析、分离,并已取得良好效果。
聚二乙烯苯多孔小球GDX-201
GDX-201不锈钢填充柱 详细信息:
以聚合物为基础的固定相—GDX业已广泛应用于许多领域中的性化合物的分析、分离,并已取得良好效果。
聚二乙烯苯多孔小球GDX-201
40-60目,60-80目,80-100目,较高沸点样品分析
规格:2m*3mm
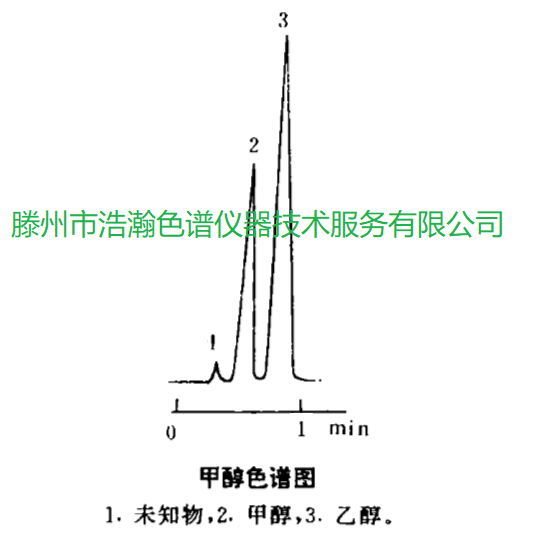
应用 :醇类分析
甲醇中微量乙醇及乙醇中微量甲醇的分离与分析一直是人们颇为关注的问题。由于高含量的峰易将低含量的峰掩盖,使二者难于分离或分离度很小。
滕州市浩瀚色谱仪器技术服务有限公司,用2m长GDX-201不锈钢柱,可将甲醇和乙醇较好分离,用于定量分析其准确度、度均较好,检测限可达0.005%。
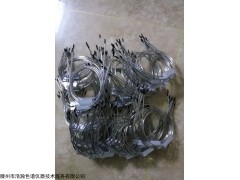
GDX-201不锈钢填充柱 图片:

high quality
Each column is rigorously tested
Full range of columns
Reliable technical support
Years of accumulated chromatographic analysis experience and technical team
High-quality stainless steel tubes, glass tubes and chromatographic packings for a variety of highly efficient packed columns
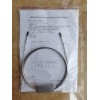
If you need to use stainless steel filter as the plug at both ends of the column, please specify when ordering.
If an on-column injection is used, there will be 6 CM of space at the front of the column inlet.
In order to prevent the elution of the chromatographic packing, both ends of the column are sealed with silanized glass wool.
If a valve injection or non-column injection column is used, the column inlet is filled
Glass column co
2mm inner diameter glass column tube has a bevel at the entrance to facilitate injection
Each column is fully aging and rigorously e
Precautions
Thank you for purchasing the column produced by Haohao.
Every column provided by Haohao is aging. To ensure the analytical separation you get, please aging for 1-2 hours before use. When aging, the carrier gas should be passed for a
To avoid co
When the oven temperature is higher than room temperature, a small amount of oxygen in the carrier gas will damage the statio
When installing the column, the product grade should be facing the operator and the left side is the column inlet (or see the label).
When disassembling the column, first lower the column temperature to room temperature and then turn off the carrier gas.
Introduction and installation of capillary column
1. Haojing Chromatography Each gas phase capillary column has undergone rigorous industry specification testing for column loss, sensitivity and efficiency, providing you with reliable qualitative and quantitative analysis results.
2. Provide peak shape and excellent signal to noise ratio.
3. Capillary columns have industry-leading technology, high inertness, low bleed levels and high inter-column reproducibility.
4. Capillary columns are tested according to strict industry standards according to requirements, and according to the requirements and practical applications, the production of capillary columns which can be washed by crossl
Capillary column installation:
1. Carefully check the column for damage.
2. Collect the necessary installation tools: column cutter, column nut, washer, magnifying glass, typewriter correction fluid.
3. Unscrew the column a
4. Install the column in the oven. If possible, use a column hanger.
5. Install nuts and Vespel or graphite pads on both ends of the column. Pull the nut and washer down the column a
6. Cutting the column. Slightly draw a
7. Make sure that the tidy mouth is tidy. Catch the column with your thumb and forefinger, as close as possible to the scratch. Gently bend the column. The column should be broken easily. If the column cannot be broken, it cannot be forced. Cut the column again in different places and try to get a clean and tidy mouth.
8. Install the column at the inlet. Check the GC manufacturer's instrument manual for the correct installation interval. Use the typewriter correction fluid to mark the correct spacing on the column. Insert the column into the inlet. Tighten the column nut by hand until it begins to grip the column. Twist the 1/4-1/2 turn again so that the column does not come out when you gently pull it.
9. Make sure the carrier gas passes through the column. Check the bubble by placing the end of the column into the tong.
10. Load the column into the detector. Check the instrument manufacturer's instructions for the appropriate installation interval.
11. Check for leaks. This is very im
12. Set the appropriate temperature for the inlet and detector.
13. Set the appropriate makeup gas and test gas flow. Ignition or turn on the detector.
14. Cold-blot the column for at least 10 minutes at room temperature (approximately 6 times the column volume).
Each column is rigorously tested
Full range of columns
Reliable technical support
Years of accumulated chromatographic analysis experience and technical team
High-quality stainless steel tubes, glass tubes and chromatographic packings for a variety of highly efficient packed columns
If you need to use stainless steel filter as the plug at both ends of the column, please specify when ordering.
If an on-column injection is used, there will be 6 CM of space at the front of the column inlet.
In order to prevent the elution of the chromatographic packing, both ends of the column are sealed with silanized glass wool.
If a valve injection or non-column injection column is used, the column inlet is filled
Glass column co
2mm inner diameter glass column tube has a bevel at the entrance to facilitate injection
Each column is fully aging and rigorously e
Precautions
Thank you for purchasing the column produced by Haohao.
Every column provided by Haohao is aging. To ensure the analytical separation you get, please aging for 1-2 hours before use. When aging, the carrier gas should be passed for a
To avoid co
When the oven temperature is higher than room temperature, a small amount of oxygen in the carrier gas will damage the statio
When installing the column, the product grade should be facing the operator and the left side is the column inlet (or see the label).
When disassembling the column, first lower the column temperature to room temperature and then turn off the carrier gas.
Introduction and installation of capillary column
1. Haojing Chromatography Each gas phase capillary column has undergone rigorous industry specification testing for column loss, sensitivity and efficiency, providing you with reliable qualitative and quantitative analysis results.
2. Provide peak shape and excellent signal to noise ratio.
3. Capillary columns have industry-leading technology, high inertness, low bleed levels and high inter-column reproducibility.
4. Capillary columns are tested according to strict industry standards according to requirements, and according to the requirements and practical applications, the production of capillary columns which can be washed by crossl
Capillary column installation:
1. Carefully check the column for damage.
2. Collect the necessary installation tools: column cutter, column nut, washer, magnifying glass, typewriter correction fluid.
3. Unscrew the column a
4. Install the column in the oven. If possible, use a column hanger.
5. Install nuts and Vespel or graphite pads on both ends of the column. Pull the nut and washer down the column a
6. Cutting the column. Slightly draw a
7. Make sure that the tidy mouth is tidy. Catch the column with your thumb and forefinger, as close as possible to the scratch. Gently bend the column. The column should be broken easily. If the column cannot be broken, it cannot be forced. Cut the column again in different places and try to get a clean and tidy mouth.
8. Install the column at the inlet. Check the GC manufacturer's instrument manual for the correct installation interval. Use the typewriter correction fluid to mark the correct spacing on the column. Insert the column into the inlet. Tighten the column nut by hand until it begins to grip the column. Twist the 1/4-1/2 turn again so that the column does not come out when you gently pull it.
9. Make sure the carrier gas passes through the column. Check the bubble by placing the end of the column into the tong.
10. Load the column into the detector. Check the instrument manufacturer's instructions for the appropriate installation interval.
11. Check for leaks. This is very im
12. Set the appropriate temperature for the inlet and detector.
13. Set the appropriate makeup gas and test gas flow. Ignition or turn on the detector.
14. Cold-blot the column for at least 10 minutes at room temperature (approximately 6 times the column volume).
相关产品
在线留言 |